Getting Started with the GQL Platform API
Execute a ping query using the playground
ping query using the playground💡 This is a simple query just to test that you have access to the GraphQL Platform API.
-
Log in to your Enterprise Hub tenant, such as yourcompany.hub.rapidapi.com.
-
From the API Hub, search for and click on the GraphQL Platform (or similarly named) API. If you do not see this API, contact your administrator to request access.
-
You should be brought to the playground for the GraphQL Platform API. The left frame contains the schema for the GraphQL Platform API.
💡 A GraphQL schema defines the queries, mutations, and/or subscriptions that are supported by the server side of the API. Queries, mutations, and subscriptions are know as operation types.
💡 Notice that two operation types are supported in the Platform API: queries and mutations. Queries read data and mutations change data.
-
The middle frame contains the request information. Notice that there is a single endpoint for all API requests:
POST graphQL. Scroll down in the middle frame and notice the GQL Query textbox. This will contain the query sent to the server. -
In the middle frame, click the context dropdown (near the top of the frame) and click Personal Account. You will use your personal account for working with APIs. If the personal account is not available, you can also select a team context. If you use a team context, remember to set the x-rapidapi-identity-key header.
💡 It is recommended that you perform these queries and mutations in your Personal Account so that you don’t create APIs in the team context.
-
In the left frame of the playground, expand Queries. This shows a list of all of the types of information that can be obtained (queried) from the server.
-
Hover over the
pingquery and click ADD QUERY. Notice that the GQL Query textbox now contains the following query (you may need to scroll down to see it):
query ping {
  ping
}
This is a request for data to be returned as a JSON object with a property of
pingand a value as defined on the server. This operation is namedping. Operation names are optional.query { ping }is also a valid query. The operation type ofqueryis shown here, butqueryis the default operation type. Therefore, this query can be simplified to{ ping }.
Tip: The top line of the left frame contains breadcrumbs/links to navigate back in the schema.
Even though we use the ADD QUERY button for this request, (for now) this approach may only work well for simple queries like this. The queries are automatically generated from the schema. The queries include all nested fields and variables that are available when drilling down through the schema. This is useful in some circumstances, but may be too complicated to work with in practice. That is why from now on we are mostly copying queries in this document.
- In the frame on the right, click Code Snippets and notice that the code (in your language of choice) has been populated with this query. The query is sent to the server in the body of the POST request as the data.query object.
- Click Test Endpoint. You should see that the value of the
pingproperty ispong!. - (Optional - this assumes you are familiar with using a modern programming language) Verify that the GraphQL Platform API code snippet can be executed using Node.js or the language of your choice.
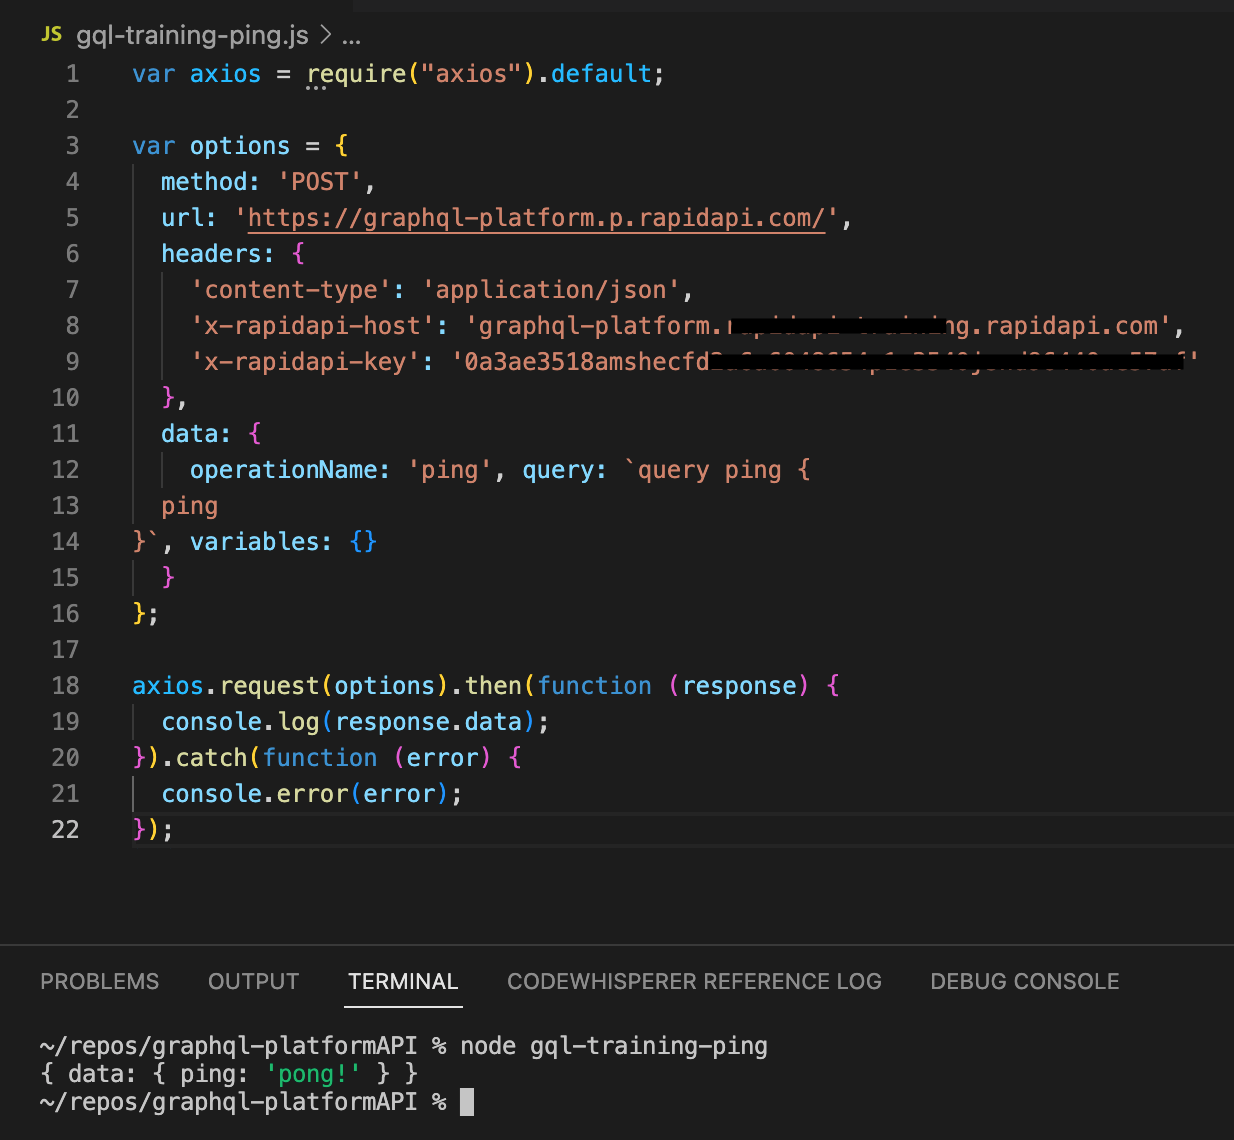
Here is some sample code using the Axios library and Node.js. You must enter valid values for url, x-rapidapi-host, and x-rapidapi-key. These can all be obtain from the Code Snippets on the right of the API Playground.
var axios = require("axios").default;

var options = {
  method: 'POST',
  url: 'https://graphql-xxx.p.rapidapi.com/',
  headers: {
    'content-type': 'application/json',
    'x-rapidapi-host': 'xxx.xxx.rapidapi.com',
    'x-rapidapi-key': '0a3ae3518amshecfd2a6a6048654p1e3540xxxxxxxxxxx'
  },
  data: {
    operationName: 'ping', query: `query ping {
  ping
}`, variables: {}
  }
};

axios.request(options).then(function (response) {
  console.log(JSON.stringify(response.data));
}).catch(function (error) {
  console.error(error);
});
Here is sample output using VSCode.

💡 Congratulations, you have successfully sent your first request to the GraphQL Platform API using the RapidAPI playground. You are now ready to learn about and execute queries and mutations.
Updated 2 months ago
